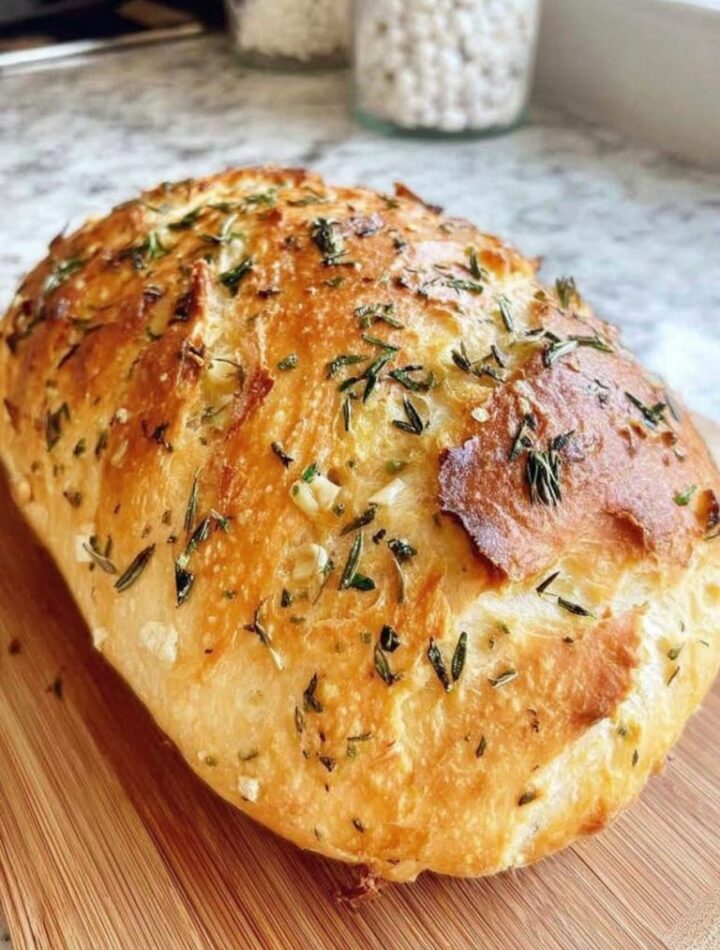
This no-knead gluten-free bread is perfect if you want homemade bread without complicated techniques or heavy effort. Unlike traditional bread, gluten-free dough does not need kneading, which makes this recipe ideal for beginners. The result is a loaf with a soft, moist interior and a beautifully crisp crust, perfect for sandwiches, toast, or simply enjoying with butter.
Bread
Why This Recipe Works
- No kneading required – gluten-free dough benefits from mixing, not kneading
- Simple ingredients – easy to find and customizable
- Long fermentation – improves flavor and texture
- Beginner-friendly – clear steps and helpful tips
Ingredients
Dry Ingredients
- 2 ½ cups gluten-free all-purpose flour (with xanthan gum included)
- 1 ½ teaspoons salt
- 1 tablespoon sugar or honey (helps yeast activation and flavor)
- 2 ¼ teaspoons (1 packet) instant or active dry yeast
Wet Ingredients
- 1 ½ cups warm water (about 105–110°F / 40–43°C)
- 2 tablespoons olive oil or neutral oil
- 1 teaspoon apple cider vinegar (improves texture and rise)
Equipment Needed
- Large mixing bowl
- Wooden spoon or spatula
- Plastic wrap or kitchen towel
- Dutch oven or oven-safe pot with lid (recommended for best crust)
- Parchment paper
Step-by-Step Instructions
Step 1: Mix the Dry Ingredients
In a large mixing bowl, add the gluten-free flour, salt, sugar, and yeast.
Whisk or stir well to ensure everything is evenly combined. This helps the yeast distribute properly and prevents uneven rising.
Step 2: Add the Wet Ingredients
Slowly pour in the warm water, olive oil, and apple cider vinegar.
Using a wooden spoon or spatula, mix until a thick, sticky dough forms.
Flour
Important:
Gluten-free dough will look more like a thick batter than traditional bread dough. This is completely normal.
Step 3: Rest and Rise (No Kneading!)
Cover the bowl with plastic wrap or a clean kitchen towel.
Place it in a warm, draft-free spot.
- Let the dough rise for 2–3 hours, or
- For better flavor, let it rest overnight (8–12 hours) at room temperature
The dough should rise slightly and look bubbly on the surface.
Sugar
Step 4: Preheat the Oven and Pot
About 30 minutes before baking:
- Preheat your oven to 450°F (230°C)
- Place your Dutch oven (with lid) inside the oven to heat
This step is crucial for creating a crispy crust.
Step 5: Shape the Dough
Lay a sheet of parchment paper on your counter.
Carefully scrape the dough onto the parchment.
Yeast
With wet hands or a spatula:
- Gently shape the dough into a round loaf
- Do not punch down or knead
Step 6: Bake the Bread
Carefully remove the hot Dutch oven from the oven.
- Lift the dough (with parchment) and place it inside the pot
- Cover with the lid
- Bake for 35 minutes covered
- Remove the lid and bake for 10–15 minutes uncovered until golden brown
The bread should sound hollow when tapped on the bottom.
Mediterranean Cuisine
Step 7: Cool Completely
Remove the bread and place it on a wire rack.
Let it cool for at least 1 hour before slicing.
Cutting too early can make the bread gummy.
Texture & Flavor
- Inside: Soft, slightly chewy, and moist
- Outside: Crisp, bakery-style crust
- Flavor: Mild, slightly tangy, and perfect for sweet or savory toppings
Helpful Tips for Best Results
- Use a gluten-free flour blend with xanthan gum
- Measure flour using the spoon-and-level method
- Warm water should feel warm, not hot
- Don’t skip the vinegar – it improves structure
- Always cool fully before slicing
Variations
Seeded Bread
Add 2–3 tablespoons of:
- Sunflower seeds
- Flax seeds
- Chia seeds
- Pumpkin seeds
Herb Bread
Mix in:
- 1 teaspoon dried rosemary
- ½ teaspoon garlic powder
Dairy-Free & Vegan
This recipe is naturally dairy-free and can be fully vegan by using sugar instead of honey.
Seeded bread toppings
Serving Suggestions
- Toast with butter or dairy-free spread
- Use for sandwiches
- Serve with soup or salad
- Dip in olive oil and herbs
Storage Instructions
- Store at room temperature (wrapped) for 2 days
- Refrigerate for up to 5 days
- Freeze sliced bread for up to 2 months
- Tip: Freeze slices individually so you can toast them directly.